Sunday, February 23, 2014

Organizing Breakdown Printable

I needed to make a more thorough to do list of my projects so that I actually have more directions and feel like I can accomplish them. I've started way too many projects in the last two weeks, and nothing has been getting completed, but all have them have had little bits done. So I made this sheet to help myself and give me direction on each of my multiple projects! Below is just a little sample, the download doesn't have the URL all over it ;)

Click for your free printable!

This is an example of what I put on one of mine:
Organization Project: Desk

Items/Space to be organized: 
1. 1st Drawer
2. 2nd drawer
3. cupboard to right
4. shelving
5. actual desk
6. top of desk

Items needed to complete project:
1. document boxes

To do:
1. get rid of old discs
2. file
3. go through paperwork on desk

Needless to say sometimes I need more specifics to actually make things feel more manageable, and as I keep working on them, I'll keep adding more and crossing off stuff off my list!

Saturday, February 22, 2014

Chicken and Rice Casserole

I was trying to replicate a classic recipe my grandma used to make us. It was so good. This is close, but not the same. I will definitely keep trying though! Since it wasn't the same, I didn't love it, but my husband and 8 year old were HUGE fans. When your 8 year old eats something without complaining, you know you've done a good job.  This is the recipe for how I made it tonight, but at the end, I'll write some possible modifications, and you can look at the pictures and judge for yourself!

Chicken and Rice Casserole Recipe
Ingredients:
3 chicken breasts, cubed
2 cups of water
2 cups of instant brown rice
1 (10.75 oz) can of cream of chicken soup
1 (10.75 oz) can of cream of mushroom soup
1 (10.75 oz) can of cream of celery soup
salt and pepper to taste
1/2 cup of butter, sliced thinly
about 1 1/2 to 2 cups of cheddar cheese 

Directions :
1.Preheat oven to 400 degrees F. Grease a 9x13 baking dish.
2. Mix together chicken, water, rice, and soups in the casserole dish (do it gently or you'll slosh stuff out)
3. Add salt and pepper over the top of it.
4. Arrange butter slices evenly apart on top.
5. Bake for approx 60 minutes.
6. Take out dish, and sprinkle cheese all over the top, put back in the oven for approx. 10 minutes or until cheese is bubbly. Cool for about 10-15 minutes before serving.


Now for some pictures!
First here are the ingredients minus the cheese and water.
 
This is how it looked after adding everything, and lastly the soup. Kind of gross looking.
 This is how it looked all stirred together with the butter on top.
And the finished product:


Now I haven't TRIED these suggestions, but this what I might possibly do in the future. For one, I would either add an additional cup of rice and water OR omit the cream of chicken soup. I would also add some chopped celery and fresh mushrooms to it. The next time I make it, I will try these modifications and report back on my findings. :)

But don't forget! My husband and 8 year old son LOVED it just the way it was, so I'd suggest making it that way first, then messing around with it to see how you might like to change it. 


Friday, February 21, 2014

Easy Egg Salad Sandwich Recipe

This is a really great base recipe with the right proportions of egg, mustard, and mayo for you to be able to add your own extra like celery or bell pepper or whatever you're into.

Egg Salad

Ingredients:

8 eggs
1/2 cup of mayonnaise
1 tsp prepared yellow mustard (or dijon if you like that)
salt and pepper to taste
1/4 tsp paprika


Directions:

1. Place eggs in sauce pan and cover with water. Bring to boil and immediately remove from heat. Cover eggs and let them sit in the hot water for 10-15 minutes. Remove from water, cool, peel, and chop.
2. Place chopped eggs in a bowl, and stir in mayo, mustard, salt, pepper, paprika and all your other optional ingredients. Stir and serve on bread or crackers!


Some variations may include adding chopped green onion, or celery, bell pepper, adding dill (which can be strong so be careful). We tried it with the chopped celery once, and we weren't into it. I think the above recipe with some Dill on bread with lettuce is delicious! The lettuce adds some crispness without any intense flavors, so you can really enjoy your egg salad.


Thursday, February 20, 2014

Valentine's Day

This is a little late, but I thought I'd still share our Valentine festivities, which just included eating a yummy steak dinner, pigging out on sugar, and watching Game of Thrones and Dexter.

Jon got me flowers and a much needed gift certificate for a massage. It's weird what a bunch of extra weight in your uterus does to your back. Tulips are "our" special flowers. I actually have never particularly loved tulips, but when we were dating, Jon kept buying them for me, because I would say I loved them. One day, I finally confessed that I hated tulips, but I had received so many tulips at that point that whenever I see tulips, I think of my husband. So they're our special flower.

Jon made us some delicious steak for dinner! All the sides were my doing, but it definitely wasn't the highlight. The steak was fabulous! He cooked it well done per pregnancy rules, but next year we'll have to do medium rare. 


 Overall, we had a fun day, and we had the kind of Valentine's day that we needed: low key, intimate, at home, and quiet!


Saturday, February 15, 2014

Decluttering Inspiration

I have less than 7 weeks left before my baby furniture arrives and a house that needs a lot of decluttering and mission organization success.

A helpful idea I came across was 20/10s. It is where you spend 20 minutes cleaning/organizing and then 10 minutes doing whatever you want to do. But start small, maybe two sessions of 20/10s (an hour), the first day. You don't want to burn yourself out. This idea comes from Unfuck Your Habitat (sorry for the language, but a really inspiring tumblr of before and after pictures and a few tips here and there).

Here's a short post with 18 Five-Minute Decluttering tips. I do #16 a lot, and between finding new homes and organizing all the stuff, I make new messes to clean up, but I guess I am making some progress.

Luckily, I am not a hoarder and most of my house is relatively clean. The problem is in the midst of cleaning it always tends to look worse before it gets better (I should take pictures!). That's the stage we're at. And being pregnant doesn't give me an endless amount of energy to work with. Hopefully between 20/10s and putting away 5 random items when I have time, I can hopefully start to make bigger strides. Then I'll get back into how behind I am in scrapbooking... wait.. what? Back to baby steps! Step 1: 20/10s!

Thursday, February 13, 2014

Building a baby registry

As a first time mother to an infant, creating a baby registry has been one of the most difficult processes of pregnancy. Moms are marketed to all the time about making the best choice for baby. Well, what is the best choice for baby? Is it Graco, Chicco, Britax? Is it having a pinewood, oak, or cherry nursery furniture? Is it bumpers, breathable bumpers, or no bumpers? I don't have answers because in the end, you just have to research and weighs pro and cons of each individual product, but there is a lot of help out there to get you through it!

I started off making two registries one at Babies R Us and one at Amazon.com. I figured those invited to the baby shower would like the option of buying online or in store, and using those two venues gives them options.

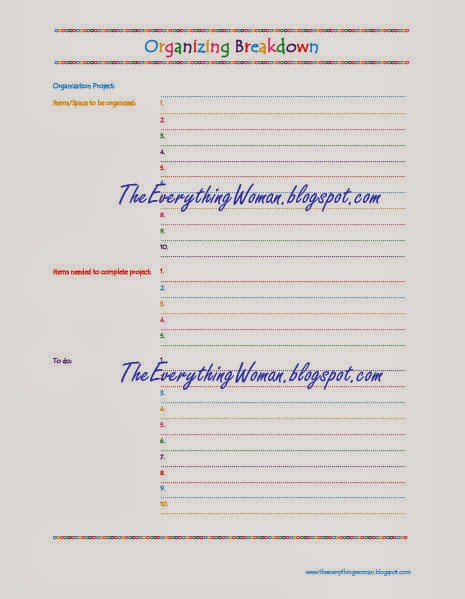
Both of the sites I am registered at have check lists of "Baby Essentials," this is a helpful starting point, but not everything is necessary, or not in the quantity they recommend. 

One of the things I'd also like to point out is that some moms don't need or want much for baby. They are perfectly content co-sleeping, breast feeding exclusively without bottles, and thus they only need to worry about buying the bare essentials like diapers, cloth or disposable. Each parent is different, and that's perfectly okay. Since this is my first, I plan on being over-prepared for anything a newborn can throw my way. If that means baby likes bouncer instead of swing, so be it! But we will have both until we figure it out. :)

I've compiled these helpful registry lists that look at different products and attempt to give moms an idea of what they think is best and essential as well as other items that moms loved and how they were rated.

1. Lucie's List
This is probably my favorite that I've come across. Everything was just matter of fact, no frills, and I liked that there didn't seem to be some big bias or diss towards parents who may choose to go with a different option. There was nothing like, "Buy Graco if you actually love your baby." Also, I liked the ease of using the site. It wasn't too confusing about what pages to go to. I never felt lost about where to find information. She also gives you pros and cons for different things like car seats. I found it really helpful.

2. Amalah's Ultimate Registry Checklist
This wasn't my favorite, but it had a lot of different brands that I wasn't used to seeing. The format isn't as nice as Lucie's List, so the content can be overwhelming. I haven't used it much, but it's another option for moms to take a look at!

3. A consolidated version of Amalah's Registry Checklist
This one is definitely easier to go through with lists and links! Something she had put on her list that I never thought of: Splat Mat! Definitely going to be adding one to my registry.

4. Pregnant Chicken's kick-ass registry
This one has lots of useful items, as well as, some fun ones like mustache pacifiers and monkey hats. It definitely important to remember to ask for some fun things for baby!


My next registry related post will be a compiled list of stuff you might want for a baby, which will essential be my registry list maybe with a few modifications. I don't think my list will include brand name recommendations, but just a thorough list of things.

Wednesday, February 12, 2014

Next on the cleaning and organizing agenda

Not much to report as far as progress with projects, but here is a glimpse at our next one. We have to move all the stuff from this room into our living spaces so that we can create a nursery for our baby girl.

You can also see my key chain collection!


Currently the cat supplies are in this room because otherwise the dog gets into them, but we just bought a cool cat box hider, which we will set her food on top of so that the dog still won't get into it, and the cat box will be hidden. Link to The Cat Washroom Bench Litter Enclosure.

One good thing is that we know we can keep the paint color the same because we chose a bedding that has pinks and yellows. It's called Dena Happi Tree.

http://www.amazon.com/Dena-Happi-Tree-Piece-Bedding/dp/B0067HLO6O/ref=sr_1_cc_1?s=aps&ie=UTF8&qid=1392171987&sr=1-1-catcorr&keywords=dena+happi+tree

I am most not looking forward to cleaning all that stuff out. It's requiring me to clean out other parts of my house to make room for all my scrapbooking supplies. Good luck to me!!!

Part of doing the DVD/Video game organization and condensing the space it used was to make room for the cat washroom and my husbands desk. We have room for that. So we just need to address items in our closet and my scrapbooking stuff.


Happy Organizing, Friends!

Tuesday, February 11, 2014

Chocolate Chip Banana Bread

I got this recipe from my wonderful and talented cousin's blog Eating True. Go HERE for the recipe.

Here are the final results! Nom nom nom! It was delicious! My husband prefers his banana bread sweet but without chocolate, so I may try it without chocolate chips, and adding 1/2 cup white sugar. I am pretty sure the chocolate was my favorite part though. :)


Sunday, February 9, 2014

Kids' Valentine's Day Cards Round 2


Micah agreed that we could make Super Hero Lollypop Valentine's Day cards. I wish I could come up with my own ideas, but I am not that original yet.

Instructions/Printables

The instructions are here at the Little Bit Funky blog.
The printable graphics are here at Less Ordinary Designs.

Cape Template 

 
Cape Template PDF

There is no cape template so my husband made mine for me which you can download by clicking this sentence or the above picture! When you print it, make sure your  page scaling is set to none, otherwise it won't print to the right scale. I put measurements on the cape so you can verify that yours printed correctly.


You need:

2 inch circle punch and scissors
1 hole punch (which I already had and did not include in cost)
Felt (the blog recommends stiff felt, but I just bought the regular flimsy kind.)
Ribbon
Lollypops
Glue
Cape Template
Printables
Sharpie (to trace cape template on felt)


You can either use a 2 inch punch or scissors to cut out the circle. I recommend this Fiskars Squeeze Punch, the X-Large size is the one that cuts 2 inch circles.I bought mine at Michael's and used a 40% off coupon, which reduced the costs from $16.99 to $10.19. What a deal!


Based on my cape template, I was able to fit 9 capes on each piece of 9x12 felt square. The total felt cost was $1.65. Because I printed the printables 4 times each, I needed 1 of blue, black, green, and 2 of red.


I bought 4 spools of cordinating ribbon for $3.49.


I used some Aleen's tacky glue to adhere my Super hero logos to the felt, and it worked fine. I gave it about 20-30 minutes to dry before assembling the super hero lollypops.  I used regular computer paper, when I printed my logos up, but I would highly recommend using some sort of cardstock. The glue won't appear as much, and the colors usually look nicer printed on cardstock.


Lastly I bought 3 bags of Tootsie pops. I could have just purchased two, but I wanted a variety of colors since which colors you get is random. The total cost was $6.72.

Total cost: $22.05
If you already have a punch, then it cost even less to do this project! Definitely more expensive than regular V-Day cards, but so worth it, since they are SO cute!

I am really pleased with how the Valentine's cards came out and I think the kids will be too.


Friday, February 7, 2014

Disney Express Scrapbook Class

I took this scrapbooking class a few weekends ago, and it was the most intense class I've ever taken. We worked for nine solid hours. Our 30 minute lunch break ended up being bites of food between pages. This class was offered at a local scrapbooking store and the pages were all designed by Nancy Evans. I did add a few little things here and there from extra decorations she provided us, but not a ton. So this is it! Now I just need to add pictures. :)


I've e-mailed Nancy to see if she has a blog I can link to. Otherwise, enjoy and be inspired!!